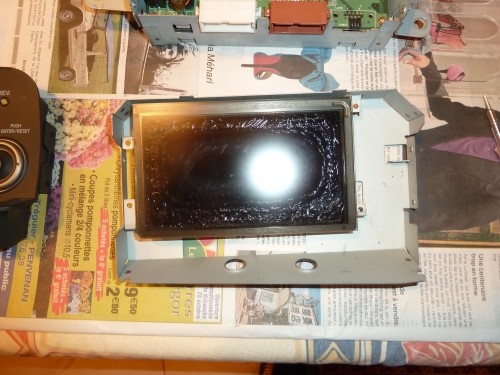
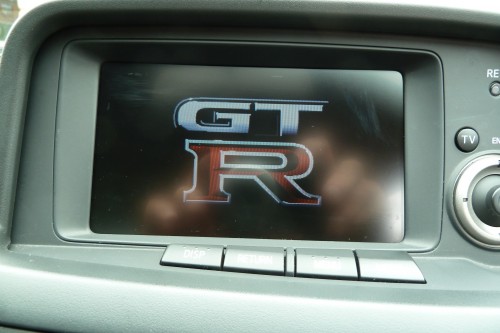
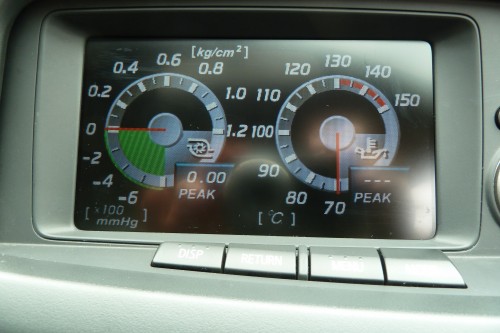
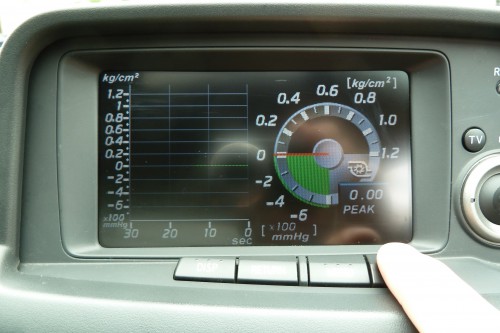
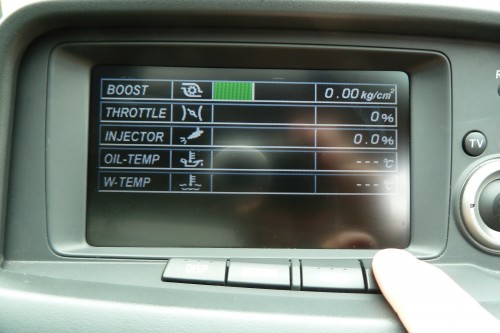
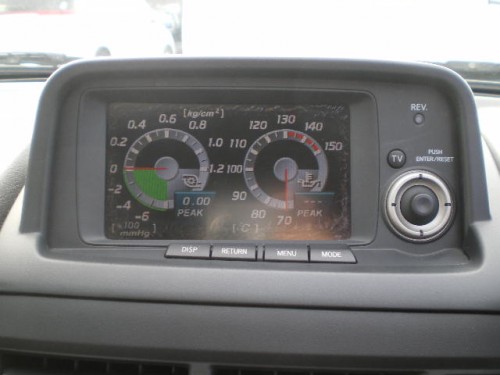
A little how to about replacing the screen of the MFD : how to disassemble the MFD, how to replace the screen, how to set up image and how to put it back !

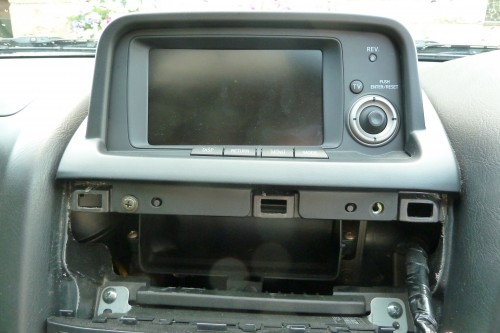
When I bought my car the display of the MFD (multi fonction display) was slightly cracked but I could lived with that. It was mainly because of the car being parked in sun light that ended up damaging the screeen after 10 years.


My cracked MFD (yeah that was pretty bad) :


Of course you can buy a replacement screen from Nissan but it’s retailed at 1100 euros (new MFD from RHDJapan). That was a bit expensive at first look so I decided to go for a cheaper solution : replacing the polarized plastic film (you can order one from 3dlens)
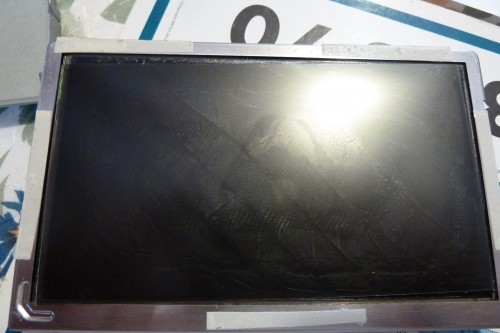
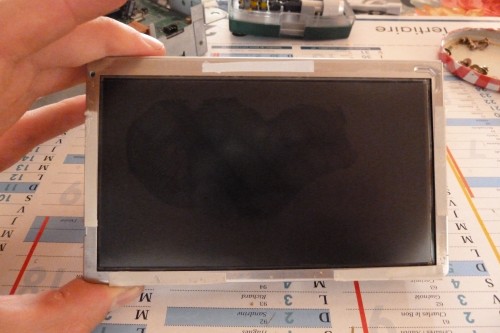
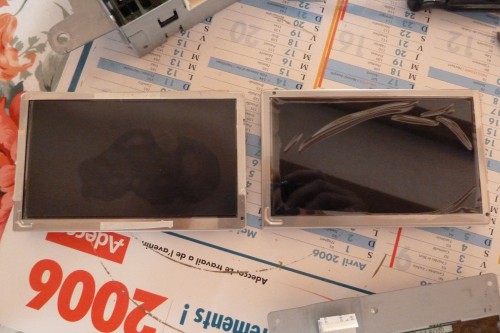
I ordered a cheap polarized film and I replaced it. You can see the screen (second picture) without the polarized film : it’s badly damaged.

Having a new polarized film worked fine. One could tell the screen was damaged but it did the trick  …. but only for a couple of weeks. Soon after the change the screen was showing signs of wear : red spots showed on the screen again !! So I decided the change the whole screen. But I didn’t want to spend over 1000 euros. I did some search and I was lucky enough to source a brand new screen for 230 euros (compare that to 1100 euros !!!)

Beware that Nissan used two type of screen for the MFD : in early GT-R (from january 1999 to june 2000) they used Shard screen. Then they moved to Toshiba screens and they finally went back to Sharp for the last R34 models. My screen is a Sharp one.

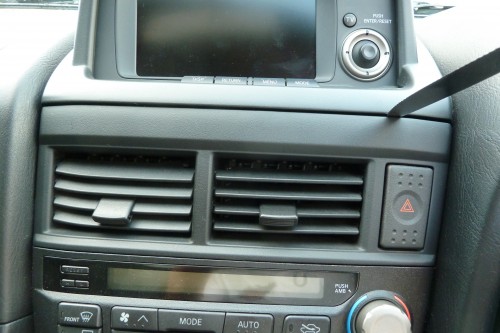
First you need to remove the MFD cover. It’s hold with two screws hidden by the center air vents. You need to unclip that first. I use a knife (thick blade so it won’t bent but it no longer cut so I won’t damage the console) and gently wedge just to unclip. There are three clips so you need to use the blade where the clip are located (see pictures below) :

Once the center air vents are removed you can see the screws : removed them and you can drop the MFD cover.

The MFD is hold with 4 screws : removed them and unplug the brown and white connectors at the back of it (the plugs have a little tab in the middle that need to be pushed down to pull them out). Take the MFD to your home to go on the disassembly.

You need a small screw driver. Remove the small screw. Unclip the ribon cable (use a small flat screw driver to unpop the ribbon holder) and remove the blue wire MFD connector.

You should have the screen in hand now (you can see marks on the screen : this is where the applied polarized film didn’t work) :

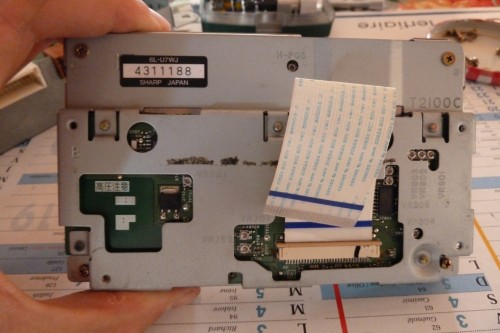
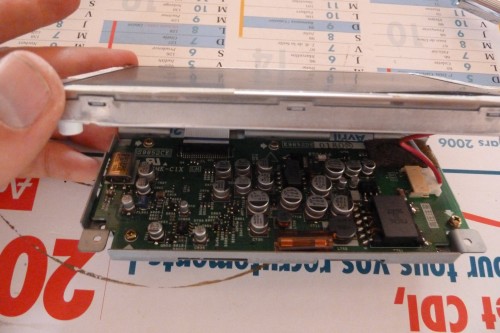
Leave the ribbon connected. At the back of the screen unscrew the four bolts in the corners. This will split the screen from the electronic board :

Be careful : you need to separate the power connector and the ribbon. Unpop the ribbon between the screen and the electronic board. You unclip the ribbon from the screen not from the board. Take your time as you don’t want to damage things …

Here are the two screens : the old one on the left and the new one on the right.

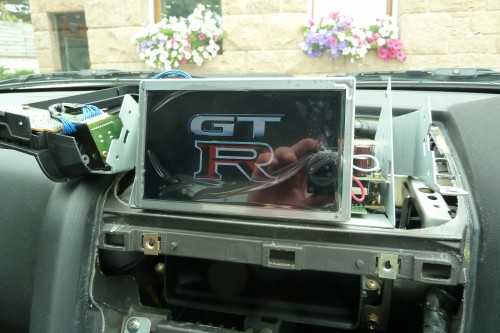
Now the tricky part : there is a little screw at the back of the screen used to adjust the image horizontally (it’s labelled H-POS ): you need to plug the ribbon and connectors back together and you put everything in place in car to adjust the image (it’s best if you are two : one holding the screen and the other to adjust the image). Then use a very small screw driver to adjust the image. You don’t need to turn a lot to have the image horizontally centered. So yes it’s a bit of a mess but that was the only way :

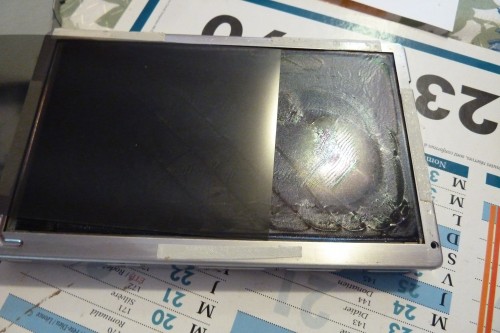
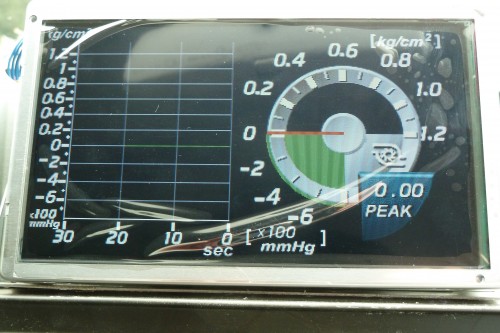
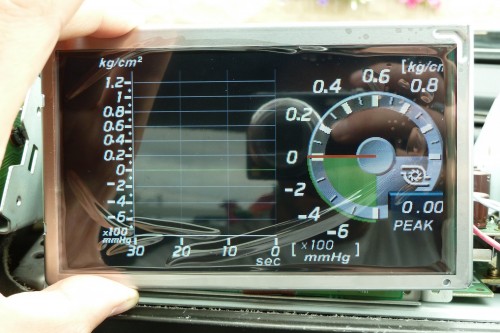
If the image is not adjusted it will be clipped on the left or on the right :

Once the image is centered you drop the protective plastic film and  you can put everything back together.

You can enjoy your brand new MFD screen !!


You can get a MFD screen on yahoo auctions from Japan but it’s a bit of a pain unless you know someone that can bid for you. Being a careful guy I ordered a spare MFD Sharp screen brand new in box. But in the end I don’t think I’ll need it for the next 10 years so it’s up for sale : 235 euros (200 £). So if you are looking for a brand new MFD screen for your R34 GT-R drop me a message : sold.

 

, , , , , , , , ,

En recherche d’un nouvel autoradio,  je conserve ma musique au format FLAC : c’est un format ouvert, compressé mais sans perte contrairement au MP3 et à l’ogg vorbis : c’est comme avoir le CD. Les fichiers sont plus gros, mais aujourd’hui avec les capacités des clefs USB et des cartes SD, ca n’est plus un problème.

Je décide donc de trouver un autoradio qui sache lire les fichiers musique dans ce format. A quoi bon avoir une telle qualité dans une voiture diront certains : ça n’est pas tant pour la qualité, mais pour le coté pratique, car il serait pénible de devoir faire une conversion d’un format à un autre à chaque fois que je veux écouter de la musique dans ma voiture. Je passe en revu les grands fabriquants d’autoradio : Alpine, Pioneer, JVC, Blaukpunt, Clario, même LG mais aucun ne propose d’autoradio reconnaissant ce format.

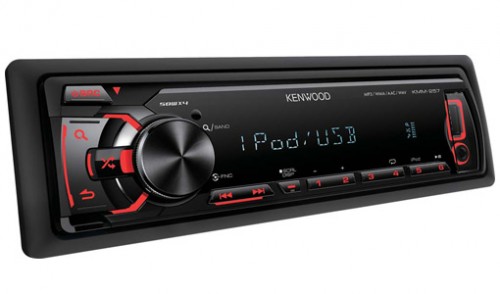
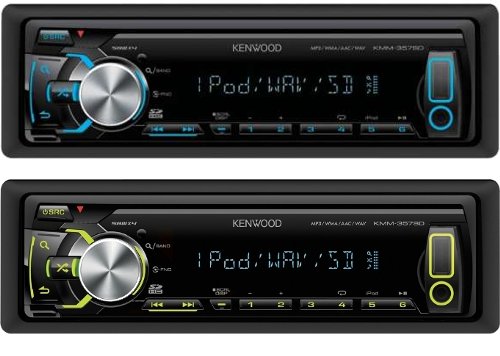
Je trouve finalement un fabriquant qui propose deux modèles lisant le format FLAC : le KMM-257 et le KMM-357 de chez Kenwood. La recherche a été rendue difficile car la majorité des sites revendeurs n’indiquent pas que l’autoradio est capable de lire le format FLAC, alors que c’est le cas (indiqué sur le site du fabriquant, voir liens en fin d’article). La principale différence que j’ai retenue c’est que le KMM-257 se contente d’un port USB en facade, alors que le KMM-357 possède un port USB en facade et un port SD card derrière la facade avant. Le KMM-357 vous permet de changer la couleur de contour des boutons (rouge, bleu, vert), c’est en rouge  pour le KMM-257.

Le KMM-257

Le KMM-357 SD Card

Facade arrière

A noter que ce sont deux autoradios « 100% numériques » : il n’y a pas de lecteur CD, ils s’adressent donc aux gens qui n’ont plus envie d’avoir une pochette de CD dans la voiture et qui préfèrent avoir leur musique sur une clef USB ou sur une SD Card.

Ils disposent tous les deux d’un tuner radio RDS (permet d’avoir le nom de la radio et changement de fréquence automatique si on se déplace) et 24 stations sont mémorisables, permettent la lecture de fichiers MP3/WMA/AAC/WAV et sont compatibles IPhone et Android.

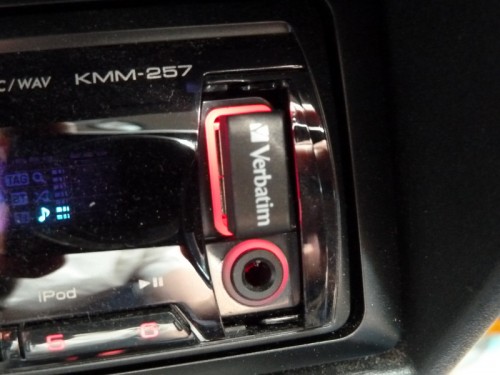
J’ai opté pour le KMM-257, environ 65 euros, le port USB en facade me paraissant suffisant. J’ai également acheté une clef USB de 8Go, toute petite afin de ne pas risquer de l’accrocher lorsqu’elle est branchée en facade. La clef Verbatim que j’ai choisie ne fait que 1.7cm de long, connecteur compris, elle dépasse d’a peine 0.5cm une fois montée, c’est parfait.

 Le test !

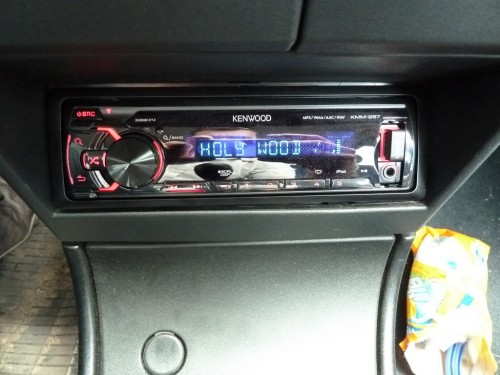
L’installation est simple, on branche le cable antenne et les deux connecteurs ISO et c’est bon. A noter que cet auradio est plus courts que les autres car il n’y a pas de lecteur CD. J’ai mis quelques albums au format FLAC encodés par mes soins, avec les tags album, artistes, chansons etc etc renseignés : tout est bien reconnu comme vous pouvez le voir sur la photo. Un bouton permet de changer l’information qui est affichée : nom du fichier ou bien les informations présentes dans les tags du fichier, nom du répertoire, etc etc. La radio fonctionne très bien, rien de particulier à signaler. Les boutons en facade sont un peu raides comme sur les autoradios, par contre la molette de réglage du volume est agréable.

Voila trois mois que je l’ai installé, c’est un sans faute, tous les fichiers FLAC que j’ai encodés ont été lus correctement, c’est une vraie satisfaction, surtout pour le prix : environs 65 euros chez amazon !

Liens utiles :

, , , , ,

Small article about installation of bonnet damper on my BNR34 …

You’re tired of the bonnet holder as I was you might want to fit bonnet damper. These usually sell around 80£ unfortunately they cost a small fortune for the Skyline. The reason why remains to be answered …

I was lucky enough to put my hands on a set of Tein bonnet hood from ebay sold by tein UK. Only 90£ delivered. But these are no longer made it was probably an old stock. Greddy do dampers as well as Top Secret but there are not cheap. Beware bonnet dampers are different from aluminium bonnet and carbon fibre bonnet.

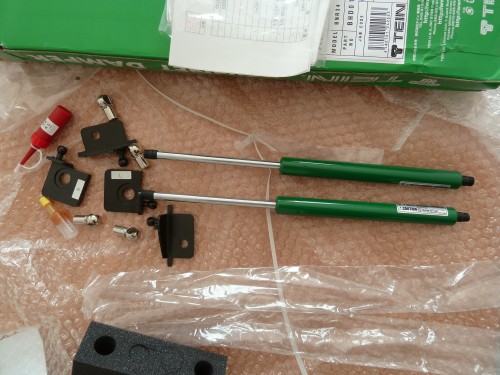
Content of the package :

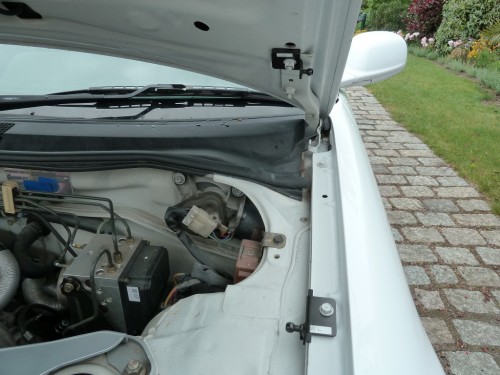
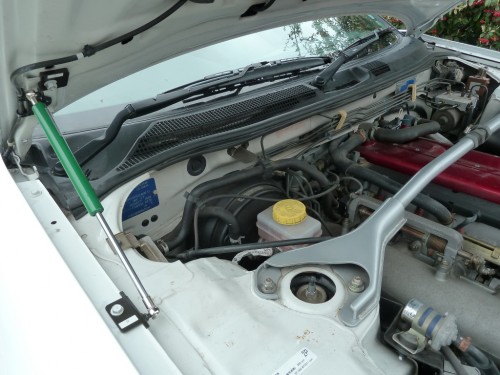
Installation is fairly easy and it will take you around 20 minutes. Put some thread locker on the ball joint and tighten them on the dampers. Install the four brackets : two on the bonnet and the remaining two in the engine bay as per the pictures. You can’t go wrong with the stickers on the brackets.

Do not tighten hard for now. Put the dampers in position and make sure they are correctly aligned then tighten the brackets.

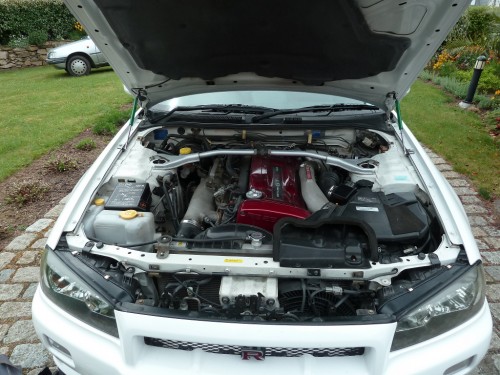
You’re done congratulations !

You can probably fit generic dampers as long as they are the same caracteristics than the Tein. I’ll update the article with the extended length and compressed length.

Unfortunately you also need the damper force but I have no idea about it. If you know a way to mesure it let me know how to do it.

, , , ,

I previously reviewed books covering the Nissan Skyline GT-R. I just discovered this morning another book related to the Skyline : Nissan GT-R supercar : born to race.

Despite the title suggests the book focuses on the latest Nissan GT-R this book is all about the Skyline. From its origins starting in the 60’s going through the famous models R32, R33 and R34.

A lot of technical information is available covering what makes a Skyline GT-R : the ATTESA system, the HICAS and it’s well known engine RB26DETT. The book gather some interesting results in motorsport as well especially when Nissan took part in the 24H Nurburgring endurance race.

If you hadn’t make up mind for Christmas it’s not too late to order this book :

Nissan GT-R supercar : born to race


Ayant décidé d’en connaître plus sur l’injection électronique des moteurs et en particulier l’impact de l’indice d’octane de l’essence qu’on met dans nos moteurs. En effet, les voitures JDM sont faîtes pour rouler au SP 100 ou SP 102, introuvable chez nous. Au dela des « on dit que » et « j’ai lu sur un forum que … »  j’ai cherché des livres parlant du sujet en profondeur, abordables pour quelqu’un qui n’a pas de formation en mécanique et surtout écrit par des professionnels, qui parlent en connaissance de cause.

Premièrement, coté livres en français c’est très pauvre, peu de livres et qui ne m’ont pas convaincus. Je me suis tourné vers les livres anglais et le choix est conséquent. Deux livres sortent du lots en ce qui me concerne.

Engine Management Advanced Tuning

Le premier : Engine Management Advanced Tuning

Engine Management Advanced Tuning

Couvre le fonctionnement d’un moteur à injection électronique, détaille l’ensemble des capteurs et « actuators » du moteur, le fonctionnement des injecteurs, comment est déterminé la quantité d’essence à injecter à chaque instant. Super instructif pour quelqu’un qui veut savoir comment fonctionne dans le détail un moteur à injection électronique et à quoi serve les différents capteurs. Ce que j’ai aimé dans ce livre c’est la vulgarisation qui le rend abordable pour le plus grand nombre et qui permet de comprendre des concepts qui semblent complexes au premier abord. En le lisant les choses semblent simples ! Et bien que le livre ne soit pas un pavé, il  est riche d’informations. Un bel achat !

Designing and Tuning High-Performance Fuel Injecton Systems

Le second :Designing and Tuning High-Performance Fuel Injection Systems

Je l’ai acheté dans un second temps et j’ai hésité car j’avais peur qu’il soit redondant avec le premier. Je me suis vite aperçu que non : ils sont en réalité complémentaires. Autant le premier fournit les bases du fonctionnement d’un point de vue plus « théorique », autant celui ci va plus directement dans le vif du sujet et explique comment comprendre une cartographie moteur et l’approche pour régler un moteur à injection électronique. Comment déterminer la taille des injecteurs, quels sont les critères à prendre en compte, détermination du couple maximum, quelques conseils sur le choix d’une sonde large bande, les différents bancs de puissance qui existent (et on comprend également que tous les bancs ne peuvent pas être utilisés pour faire une session de cartographie). Il se termine par un exemple concret de reglage.  Une large partie du livre explique comment procéder aux réglages des tables les plus importantes pour la gestion électronique, comment s’y prendre. Chaque boitier de gestion électronique est différent, mais les principes sont les mêmes et ce qui est appris ici sera utile pour toutes les marques. Vraiment super détaillé et pratique, je ne regrette pas mon achat, d’autant que si je dois aller voir un tuner, je pourrais discuter avec lui et comprendre ce qu’il me raconte et la façon dont il va régler mon auto.

C’est de l’anglais technique, si vous avez le vocabulaire anglais de base en mécanique auto, ca se lit relativement bien. J’avais commandé sur https://www.amazon.fr, j’ai été livré rapidement. Il suffit de cliquer sur les images pour tomber sur la bonne page chez amazon.

, , , , , , , ,