Comme tout amateur de mécanique, pour faire mes travaux de mécanique je suis parti de zéro ou presque en outillage. Et comme beaucoup, je n’avais pas envie de mettre cher pour les outils.

Je me suis progressivement équipé en matèriel; j’ai commencé avec du noname (sans marque); choix qui s’est avéré moyen puisque j’ai fini par revendre le noname pour prendre de la marque plus fiable car au fur et à mesure on s’aperçoit que tel outil est pas pratique du tout, mal adapté ou tout simplement incomplet.

Concernant le serrage, je respecte les préconisation du constructeur; pour faire ca, j’ai une clé dynamométrique KS Tools depuis maintenant 2 ou 3 ans dont je suis très content. Précise à 3% et un peu moins chère que des marques connues (j’ai bien dit un peu). Avant d’avoir cette clé, j’en ai eu une autre, sans marque dans laquelle je n’avais pas spécialement confiance. En comparant 2 serrages réglés à l’identiques, il y avait 20% de serrage d’écart, c’est énome. Donc mon conseil, si vous avez l’intention de faire de la mécanique souvent prenez une clé avec une bonne précision, certifiée. Ne prenez pas la plus chère, mais une qui dispose d’une bonne précision. La plage de serrage 20-200Nm permet de faire de très nombreux serrages de mécanique et devrait suffir pour beaucoup de travaux.

Ma clé (dispo chez amazon) :


P1060724 P1060723

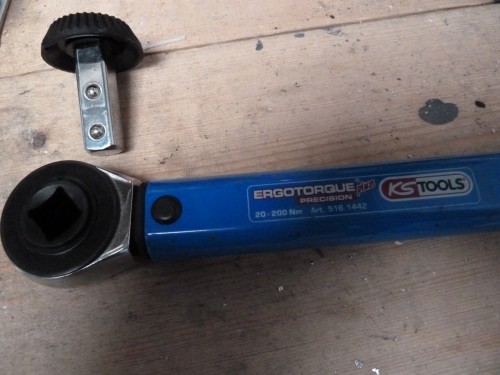
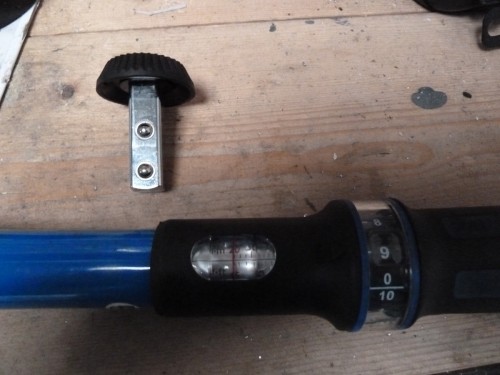
L’espèce de champignon de taille 1/2 se met dans le carré; en fonction du sens ou vous le mettez, ca permet de serrer ou desserrer … le truc bien avec ce système, c’est qu’il existe un champignon en 3/8. Du coup si vous avez un coffret en 3/8, pas besoin de changer de clé, le champignon en 3/8 fait l’affaire.

Bon ce que j’aime bien dans la gamme KS Tools c’est qu’ils ont pas mal de clés avec des plages de serrage assez variées (5-20Nm, 20-200Nm, 60-320Nm, 10-100Nm, 80-420Nm, etc etc). J’avais hésité avec la 60-320Nm, mais c’est tout de même rare de devoir aller à plus de 200Nm pour de nombreuses pièces et on a par contre souvent besoin de moins de 60Nm. Sachez qu’il y a la gamme « ergotorque » et « ergotorque precision », et que la seconde permettra un réglage bien plus précis – au Nm près – que la 1ère. J’ai pris une ergotorque pour débuter …. pour finir par prendre une ergotorque précision (la bleue ci dessus). Je devrais réfléchir un peu plus avant d’acheter des fois …

Parlons des douilles … au début j’ai acheté au fur et à mesure de mes besoins pour ne pas avoir a payer le prix d’un coffret complet mais au final … j’avais presque tout. J’ai donc revendu pour me prendre un coffret complet en 1/2 KS Tools (j’étais tombé sur une promo intéressante sur amazon), douilles de 10 à … 34 !!

Du coup j’ai pris ca (toujours chez amazon) : coffret KS Tools 1/2. Bon honêtement, sans la promo ca fait chéro je trouve. Attendez une promo ou essayez ailleur. Sur la photo le manche n’est plus tout à fait bleu car … la clé a pas mal servie. Neuf c’est comme sur la 2nde photo.

Bon, avec le recul que j’ai maintenant, je me demande toutefois si un coffret en 3/8 (douilles de 6 à 24) n’aurait pas été mieux; en effet, c’est un peu plus petit et permet donc passer dans des endroits plus étroits, ce qui peut s’avérer très utile parfois. De plus les douilles de 27-30-32-34 qu’on trouve dans le coffret en 1/2 ne vous serviront peut être qu’une ou 2 fois, vous pourrez toujours les acheter à part le jour où avec un adaptateur 3/8 -> 1/2.. Bref, à vous de voir. Le coffret en 3/8 est dispo chez Amazon, à un prix plutôt intéressant :


Ensuite je ne peux pas faire l’impasse sur les clé plates … et comme d’habitude, j’ai commencé par en prendre au compte goute. J’ai essayé les clé à fourches, les doubles à cliquet pour finir par les clé mixtes. A l’usage, les clés mixtes me paraissent les plus pratiques. J’ai fini par revendre ce que j’avais acheté par ci par là pour prendre un coffret. J’ai prix du Kraftwerk (c’est une marque connue, proposant une garantie à vie), une occasion intéressante s’étant présentée. Ca va du 8 au 19 (sans le 16 et le 18), la qualité est là … mais la partie clé plate est un peu trop épaisse (xxmm pour la clé de 17 par exemple) et pourra vous poser des soucis pour passer à certains endroits. Donc mon conseil … ayez en une en main avant d’acheter et soyez attentif à l’épaisseur. La contre partie, c’est que c’est robuste !

Mes clefs (chez amazon : bon c’est pas donné, attendez une promo):

Enfin il m’arrive de devoir faire du sertissage. Là pareil, je n’ai pas voulu mettre cher. J’ai pris une pince sans marque, qui dépanne bien, avec des embouts dont je ne me servirai jamais … et qui faisait du travail moyen sur les embouts vraiment utiles. J’ai finalement pris une pince à sertir Knipex, et la ca fait du super boulot. Ma pince (trouvée chez amazon encore):

P1060720

Bon par contre, j’aurai mieux faire de prendre celle ci (Knipex 9722240) qui permet de sertir 2 types d’embouts (en plus c’est le même prix ):

Si vous ne connaissez pas Knipex, c’est une marque qui fait partie des références pour les pinces.

Certes, elle ne peut faire que 2 types de sertissage, mais elle les fait très bien, c’est les 2 types de sertissage qu’on trouve le plus sur les voitures.

Au final, le meilleur conseil que je peux donner, c’est que si vous allez vous servir longtemps de l’outil, mieux vaut mettre un peu plus, vous ne le regretterez pas. Si c’est occasionnel, que ca ne vous servira que quelques fois en tout, un outil pas cher fera l’affaire. Et toujours se demander est-ce qu’il vaut mieux un outil qui fait un bon travail plutot qu’un outil qui peut faire plusieurs choses mais de façon moyenne. Parfois un outil moyen suffira, parfois mieux vaudra un outil de qualité.

, ,

While I was doing an oil change I noticed what looks like oil at the rear of the transfer case. Following the oil it appeared to come from the gear control lever.

Getting access to the control lever is easy :

1. Remove the bolt circled in red and pull the board gently.

P1060698

2. Remove gear knob and remove the 4 bolts securing the large boot.

P1060702

3. Remove the boot. You can see now the top of the gearbox. Actually it’s the transfer case. And you can see oil on the smaller boot and on the larger boot just removed.

P1060703_1600

On the above picture, circled in red is a crack on the smaller boot. This part needs to be changed. Oil is obvisouly coming from here. You remove this boot by sliding the spring up. Then cut or slide the lower zip tie holding. You can then slide up the cracked boot gently. Clean the oil first to avoid oil on the top of the control lever. You should now have something like the following :

P1060710_1600

Now beside the obvious boot that must be changed I don’t know if it’s expected to have oil in this place. R33 and R32 had a similar issue. But Nismo provided a kind of transmission baffle plate for the gearbox (part number 32150-RS590) to solve the problem :

Nismo-tramission-baffle

So I started to think the R34 had similar issue. But after looking at the top plate I understood Nissan had already used a baffle plate on the R34 :

1484056083075_default

So next step is to remove the control lever (pliers ring required). I will inspect the ball cup bushing to see if a replacement is required.

, , ,

Why fitting new ones ?

My car is fitted with OEM shock absorbers. I didn’t realise it until I saw the picture but the car takes some roll and it seats quite high :

OEM_suspension

So I decided to replace the standard shock absorber and to go for new coilovers with adjustable height and adjustable damping. Severals brands are available : Tein, HKS, Ohlins, Nitron, etc etc and many other cheaper alternatives. Nitron is really expensive for my use. I read many feedback about Tein being harsh. HKS and Ohlins coiliovers have very good reviews but I was concerned they are designed for Japan roads and our roads may not be as good as the japanese ones. I though coilovers developed for our roads would be a better choice.

After hours of reading about the various brands I went for MeisterR coilovers. Their GT1 model was designed to challenge Ohlins DFV (Dual Flow Valve). I haven’t try the Olhins so I cannot comment. But the GT1 has also a dual flow valve system and they have been designed on UK roads.

meister_r_logo

Settings and installation

I received the coilovers quickly after ordering them – the guys from MeisterR were available to answer my questions and very helpfull. I will save you some trouble : if you order coilover don’t forget to order a set of Damper Adjustment Extension Cable : it will save you some pain for a small cost when it came to adjust the rear damping. Worth it.

The coilovers :

MeisterR GT1 for BNR34

On the picture below with both OEM and GT1 you will notice the GT1 is shorter than OEM and the spring has a different design.

P1060623

I didn’t want the car seats too low. A little lower but not too much. I couldn’t find any existing settings to start with. You basically set the ground clearance by adjusting distance E.

meister-gt1-settings

After tests and trials I finally choose the following settings : front = 5.9cm, rear = 23cm. For the record this is the max height you can use on the front. It will lower the car by 3cm which is fine for my taste. However if you expect to keep the standard height stay away from the GT1.

Quick word about setting ride height and how to measure it : ride height distance must be take between the bottom fender and center of wheel with the car on a flat ground. This way tire size and wheel size don’t come in play. With standard shocks on front distance is 38.5cm and rear is 37.8cm. With the new coilovers distances are 35.5cm and 34.7cm. You will notice the distance is bigger at the front than at the rear : this is by design the front guard being bigger than the rear guard. When you install new coilover you want to keep this difference between front and rear.

Fitting the new coilover is easy. You need to jack stand the front axle to proceed the front and to jack stand the rear axle to proceed the rear coilovers. On the rear you will need to remove the back seat but that’s an easy job. When you fit the coilover don’t tighten the locking collar (B on the above picture) but leave some play for adjustment. Put all the bolts without tightenting them. Then, if you turn the body coilover it will allow you to adjust the height depending on the way you turn. That’s the C (or D) on the schema above.

But all this is explained in the MeisterR operational manual.

Something not explain in the manual : on the front you can notice the bracket has a longer side :

P1060631_bP1060629

The longer side must be at the opposite of the bolt in contrary to the picture. The shorter side must face the nut.

Regarding the rear coilover you need to remove the back seats and the parcel shelf. And obviously if you want to be able to adjust damping without removing the parcel each time you will need the damper adjustabment cable. Here is a picture showing where to drill holes for the adjustment cables.

P1060640

Parcel_shelf_extension_adjuster

Road test

The coilovers offer 32 levels of adjustment. Level 0 is the hardest setting. To beging with I started with 17 clicks on front and 20 clicks on rear. Compared to the standard shocks they feel better. They’re not softer but firmer and definitely more confortable. That’s what you would expect from coilovers newer than 20 years. It’s really similar to modern cars.

It’s too early to talk about reliability but on the road they really outperform the standard ones and they provide a better feeling. I almost forgot : once you have them installed you should bring the car to have geometry adjusted properly. I’ll talk about this later …

, , , , ,

Some times ago I decided to upgrade brakes. I wanted something with more efficiency that wouldn’t cost a fortune however but with track capabilities.
There are a lot of brands available brakes : AP Racing, Alcon, brembo, …. all very efficient and expensive. On the cheaper side you have D2 and their clones. You can also put early Nissan GTR brake. They’re great, devastating efficient. But …. they won’t fit under standard wheel and I wanted to keep standard wheels.

And in the middle of expensive and cheap you have Stoptech.

stoptech-meta-logo

Stoptech provides brake kits for a lot of applications. R34 is one of them. Each caliper is designed specifically for each car. Caliper templates are available so you can test fit them on your actual wheels before order.

I ordered front and rear kit. Front kit is the 4 pots with 355x35mm rotor. On the rear two options were available at the time : 2 pots and 4 pots. I went for 4 pots with a 355x32mm rotor. You may think « rear brake power is going to be to strong ». That’s without knowking pistons size are different between front and rear so a nice balance is achieved. Front kit part number is 83.645.4C00.xx (xx depends on the color). Rear pkit part number is 83.645.0047.xx but I think this is no longer available. Only the 2 pistons kit is available now (I saved their Stoptech 2010 catalog). Both front and rear calipers use a very common pad shape (ST40) so you have a large choices for the compound.

Kit delivered. It looks really great. But you can say it’s great when you fit it and when you have it tested. Everything is included except brake fluid : bolt, braided lines, calipers, rotors, brackets, thread locker.

P1050999_1600

Fitting is not difficult. Patience and attention to details is the key.

You will have to cut a part of the current brake dust boot. Some choose to drop it. I choose to keep it but it must be cut so the bigger rotor can be installed.

As you can see new rotors are much bigger and thicker than standard rotor. They will achieve better heat dissipation.

P1060010_1600 P1060008_1600

Front bracket fitted.

P1060012_1600 P1060020_1600

Rear installation : the brake dust boot must be trimmed to installed the rear bracket :

P1060041_1600 P1060054_1600

P1060069_1600


Wheel test fitment; it’s a tight fit but it’s been designed to fit under standard wheels. Once fitted you must change brake fluid and pay special attention to brake bed in. Following carrefully instructions is a key to have rotors and pads working at their max. After driving them for hundreds kilometeres and two track days I can say I’m very happy with the kit.

P1060018_1600P1060015_1600


, , , , ,

The R34 GT-R is a great car and every details were optimized by Nissan including the battery : it’s small and lightweight : only 6.5kg ! Overall dimensions are (LxWxH) 186x126x168mm.

FT-LA19LT weight

The downsize is the battery life : small. And at some point you will be looking for a replacement battery. Then you will discover quickly that your battery is unique to your car : yes, that battery was made specifically for the R34 GT-R and it’s only available in Japan.

You need to know that the space for a new battery is limited and the battery has japanese terminals (JIS). I worked it out  for hours and you are basically down with two options beside ordering an OEM battery :

  • change the wire connectors to standard connectors and you can fit a battery like the Bosch S4 001(207x175x175) : it’s a little bigger than the original battery but will fit easily and it’s more powerfull and it will last longer. Beware that to change wire connectors special tools will be required …. it’s not advised to cut wires because they’re short
  • get a battery with JIS terminals. Unfortunately the standard height of japenese batteries is little too big for the wires : 22cm versus 16cm for the original battery. You will struggle to tighten and to stretch the positive wire on the battery.  I have never seen such a battery fitted either by myself or on google. The Bosch S4 018 is that kind of battery. It will last longer BUT it isn’t more powerfull …

JIS to SAE terminals

I said there were two options. That was until I discover some terminal adapters from JIS terminals to standard terminals ! These adapters allow you to keep the actual JIS terminals and a battery with standard terminals can be plugged in.

Strangely Nissan anticipated a larger battery could be fitted : holes for a larger battery are already done ! You will need to make a battery retainer as the original one is too small (must be 18cm between holes). So far that’s the best solution I found out regarding ease of maintenance, performance and cost.

The Bosch S4 001 weights 10kg. That’s an extra 4kg but they worth it !

To remove the battery you need to remove the black metal plate and the rear strut brace. Easy job but a lot for a single battery change.

The original and the Bosch batteries :

SLA-A19LT vs. Bosch S4001

The Bosch S4001 fits easily but you will need to trim the rear bottom of it because of the strut brace :


The Bosch S4 001 installed with the terminal adapters. Needless to say the car starts easier than with the original battery !

S4 001 installed in BNR34

, ,